

WEb формы для сайта онлайн генератор. Создать форму для сайта

Моя цель - обеспечить доступ к вашему контенту любого пользователя в любом контексте просмотра - независимо от размера его экрана, скорости его подключения к интернету, возраста устройства или комбинации браузеров и вспомогательных технологий, которые они используют для сети интернет.
Я создаю интернет проекты, используя JavaScript/ Vue / React, a11y, Rich Data, CI / CD, Docker, Laravel, Rails. И многое другое.
Мне нравится писать CSS, HTML и прогрессивный JavaScript, и работать над производительностью, доступностью, созданием современных статических сайтов и потрясающими интерфейсами.
У меня есть страсть к созданию исключительных интерфейсов, приложений и инструментов, включая системы дизайна, веб-сайты Jamstack, Github и PWA.
Я работал с командами разработчиков, чтобы ускорить их цикл разработки и выпускать продукты намного быстрее, разработав и внедрив дизайн-систему, которая используется во множестве приложений.
Я помог сайтам публикаций перейти на более быстрый и безопасный стек и увеличить количество читателей с более быстрым временем загрузки и большим удобством чтения.
Я создал прогрессивные веб-приложения для издательского дела, электронной коммерции, информационных технологий, предприятий и розничной торговли, среди прочего.
люблю решать проблемы в веб-разработке, ищю возможности в аналогичной области, чтобы использовать свои знания. Я люблю создавать веб-сайты.
Разработка pwa приложений, создание любых сайтов: от сайта визитки и интернет-магазина, до порталов и досок объявлений. МОЯ особенность — я не делаю сайты ради сайтов. Каждый ресурс разрабатываю индивидуально, с учетом специфики бизнеса.
Главным критерием оценки результата для меня является прибыль моих клиентов. И это логично: довольные клиенты приносят еще больше клиентов!
Я налаживаю контакты, выстраиваю отношения и добиваюсь оптимальных результатов.
Удовлетворение потребностей клиентов - в приоритете. Я верю в понимание клиентов, прислушиваясь к их уникальным идеям и превращая их в желаемые продукты и услуги. Поддерживая корпоративную культуру, я также уделяю особое внимание оригинальности, творчеству и изобретательности, которые развивают эти качества через уважение к предпринимательскому духу.
Я создаю сайты, используя принцип платформ с открытым исходным кодом, обеспечивая безопасность интернет ресурса и используя самые современные технологии. Я разработал уникальный процесс веб-разработки, чтобы обеспечить удовлетворение каждого клиента.
Моя работа направлена на то, чтобы сделать опыт персонализированным в соответствии с потребностями и целями людей.
Web forms are a very powerful tool for interacting with users. It's one of the main points of interaction between a user and a web site or application.
Forms allow users to enter data, which is generally sent to a web server for processing and storage, or used on the client-side to immediately update the interface in some way.
A web form's HTML is made up of one or more form controls (sometimes called widgets).
Let's make a local copy of our HTML template — you'll enter your form HTML into here.
<!DOCTYPE html>
<html lang="en-US">
<head>
<meta charset="utf-8">
<title>Test page</title>
</head>
<body>
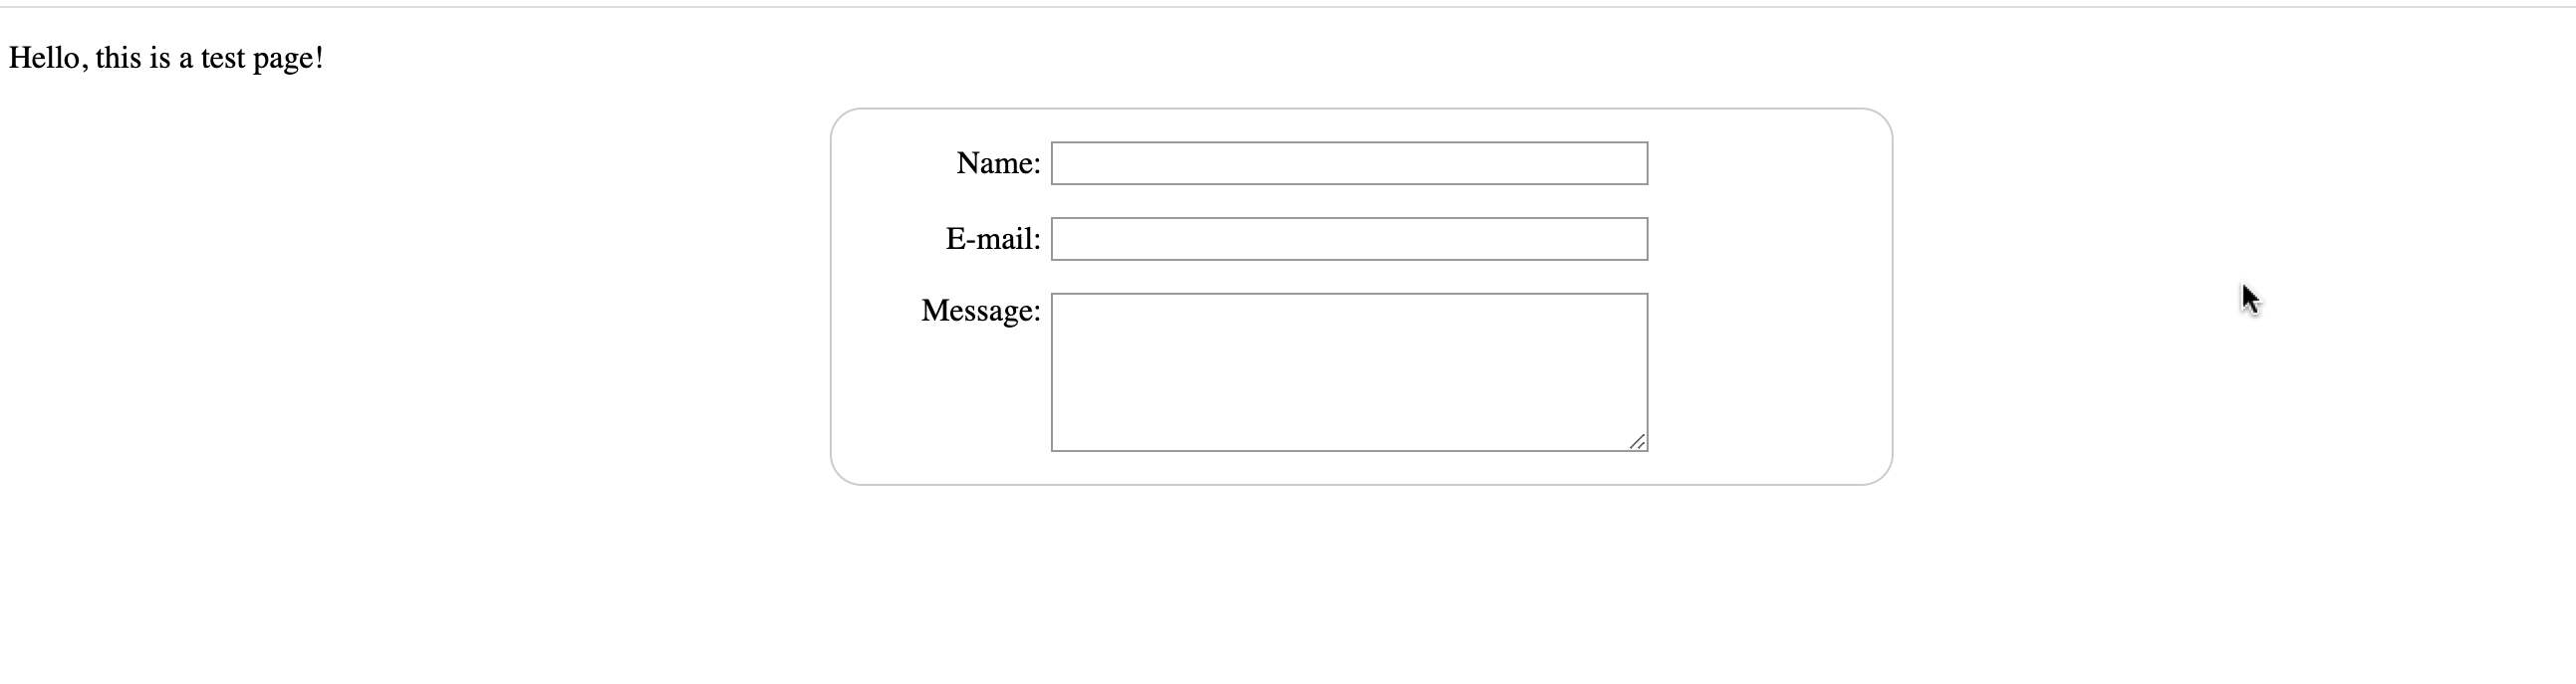
<p>Hello, this is a test page!</p>
</body>
</html>
Forms start with <form> container element, specifically for containing forms that supports some specific attributes to configure the way the form behaves. The standard practice is to set at least the action and method attributes like this:
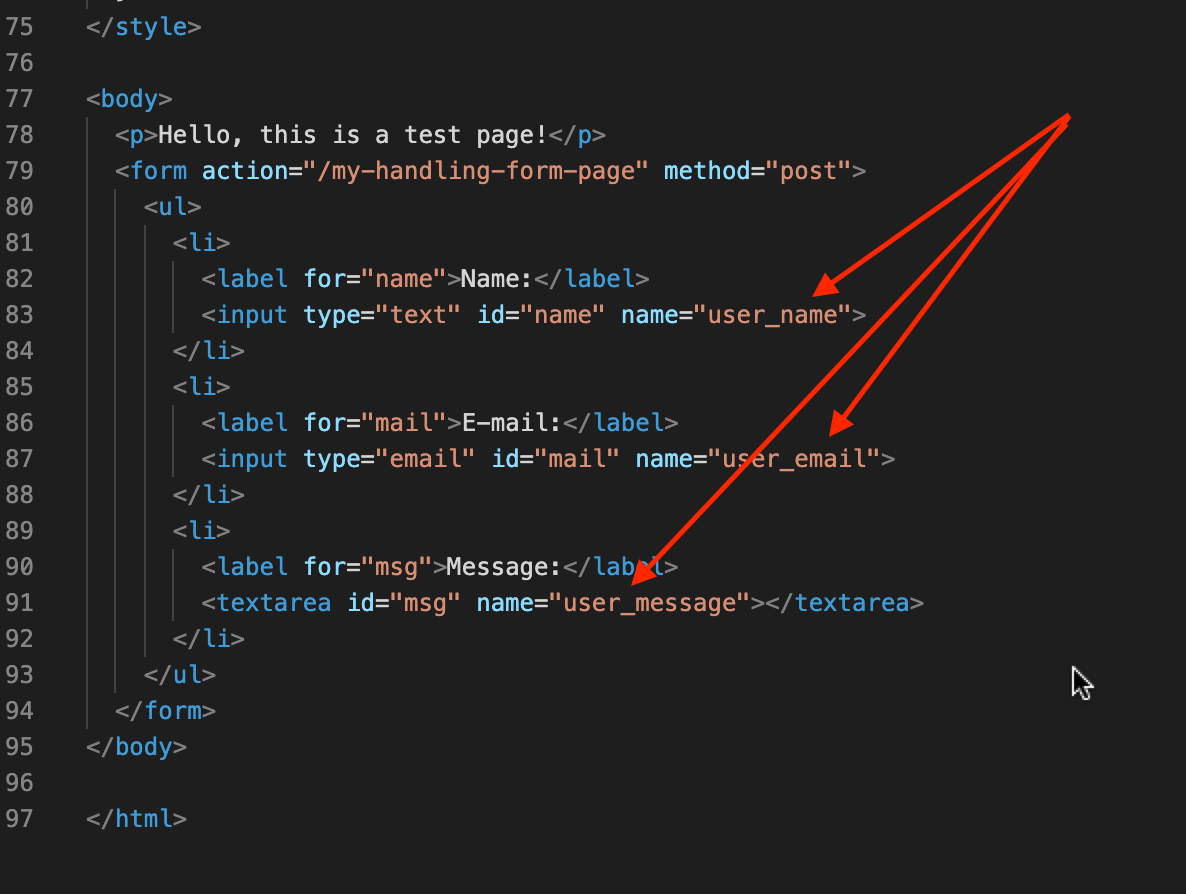
<form action="/my-handling-form-page" method="post">
 <ul>
  <li>
    <label for="name">Name:</label>
    <input type="text" id="name" name="user_name">
  </li>
  <li>
    <label for="mail">E-mail:</label>
    <input type="email" id="mail" name="user_email">
  </li>
  <li>
    <label for="msg">Message:</label>
    <textarea id="msg" name="user_message"></textarea>
  </li>
 </ul>
</form>
The action attribute defines the location (URL) where the form's collected data should be sent when it is submitted.
The method attribute defines which HTTP method to send the data with (get or `post).
Let's add the above <form>element into your HTML <body>. On the <input> element, the most important attribute is the type attribute, it defines the way the element appears and behaves.
In our example, we use the value <input/text> , it's a single-line text field that accepts any kind of text input.
For the second input, we use the value <input/email>, which defines a single-line text field that only accepts a well-formed e-mail address.
The <input> tag is an empty element, that doesn't need a closing tag. <textarea> is not an empty element, it should be closed with the proper ending tag. To define the default value of an <input> element you have to use the value attribute like this:
<input type="text" value="by default this element is filled with this text">
To define a default value for a <textarea>, you put it between the opening and closing tags of the<textarea> element, like this:
<textarea>and by default it will be text</textarea>
The button element
The <button> element accepts a type attribute - one of three values: submit, reset, or button.
A click on a
submitbutton (the default value) sends the form's data to the web page defined by the action attribute of the<form>element.A click on a
resetbutton resets all the form widgets to their default value immediately.A click on a
buttonis just a clickable button.
Sending form data to your web server
The last part is to handle form data on the server side. The <form> element defines where and how to send the data thanks to the action and method attributes.
We provide a name to each form control. It tells the browser which name to give each piece of data and, on the server-side, they let the server handle each piece of data by name. The form data is sent to the server as name/value pairs.
To name the data in a form you need to use the name attribute on each form widget that will collect a specific piece of data. In our example, the form will send 3 pieces of data named "user_name", "user_email", and "user_message". That data will be sent to the URL "/my-handling-form-page" using the HTTP POST method.
This form with added styling can be found here
Next Steps
We will need to add some form validations.
To connect please check my Github, LinkedIn or Twitter.
Thank you for reading!
![[JS] How to create confetti animations using a button with tsParticles 🎉](/_next/image?url=https%3A%2F%2Fcdn.hashnode.com%2Fres%2Fhashnode%2Fimage%2Fupload%2Fv1625209144223%2FVNOTVDZ3J.png&w=3840&q=75)


